- If necessary tap the
 or or  button to show the main menu, then tap the "Mileage Types" row. button to show the main menu, then tap the "Mileage Types" row.

- Next on the "Mileage Types" page tap the entry you want to edit:
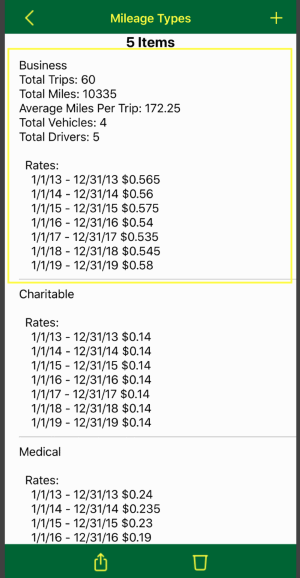
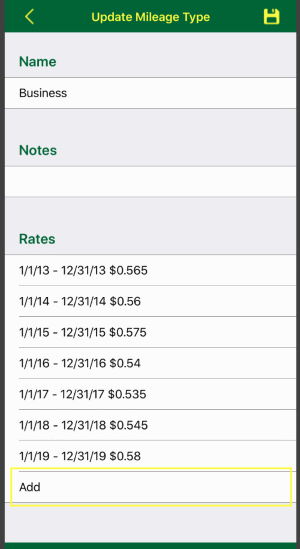
- If you want to add a mileage rate, scroll down to the rates section then:
- Tap the last row.
- After entering the details, tap the
 button to temporarily add your change or tap the button to lose any changes. button to temporarily add your change or tap the button to lose any changes.
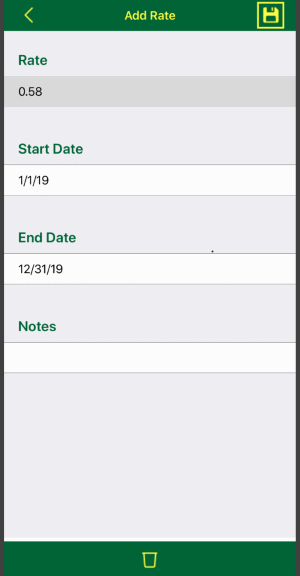
- To commit your changes including the new mileage rate you MUST tap the button on the Mileage Type edit screen.

- If you want to update a mileage rate, scroll down to the rates section then:
- Tap the mileage rate you want to update.

- After entering the details, tap the button to temporarily add your change or tap the button to lose any changes.

- To commit your changes including the updated mileage rate you MUST tap the button on the Mileage Type edit screen.
- If you want to delete a mileage rate, scroll down to the rates section then:
- Tap the mileage rate you want to delete.
- Next tap the
 button on the toolbar at the bottom. button on the toolbar at the bottom.

- To commit your changes including the mileage rate deletion you MUST tap the button on the Mileage Type edit screen.
|
|
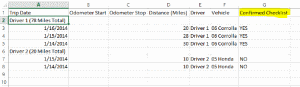
The checklist is your list of safety checks that should be performed on a daily basis. When the checklist is enabled, you will be prompted once per day for each vehicle to confirm you performed the safety checks
and the Confirmed Checklist column with a yes or no value will the added to the exported report of your trips.
To setup the checklist:
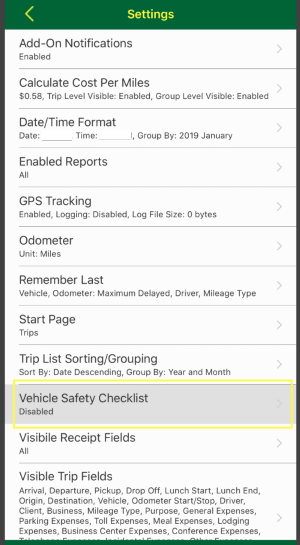
- Access the Settings Page (tap here to learn how)
- Scroll down to and tap the "Vehicle Checklist" row.
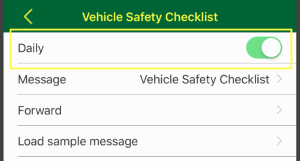
- If you want start with sample message that you can then edit then tap the "Load sample message" row
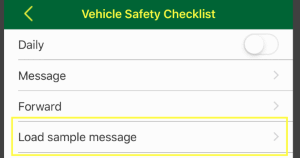
Then tap the "Message" row
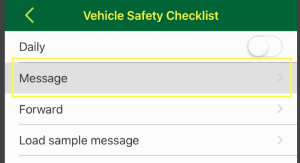
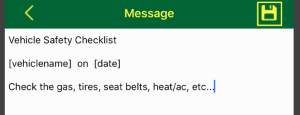
- Then type in your checklist. Add the vehicle name and/or date placeholder shown below to have the vehicle name and/or date merged into your checklist.
Vehicle name placeholder: [vehiclename]
Date placeholder: [date]
When your list is complete, tap the button to save the checklist.
- To actually turn on the checklist feature, change the toggle switch in the Daily row to
 . .
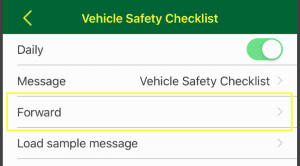
- If you need to distribute the checklist, send it by email by tapping the Forward row and providing their email addresses. On the recipients end all they need to do is tap the link in the email on their iPad, iPhone or iPod Touch to update their checklist.
|
|
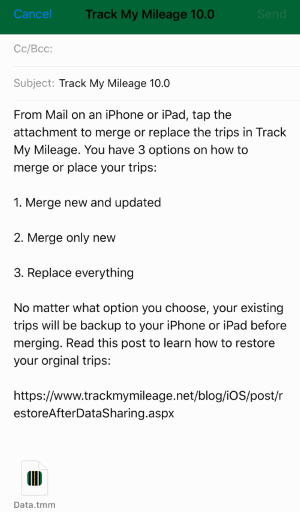
On your iPhone or iPad, open each email from each your drivers and follow these instructions:
- Open the email and tap the attachment, then tap the "Copy to TMM" option.
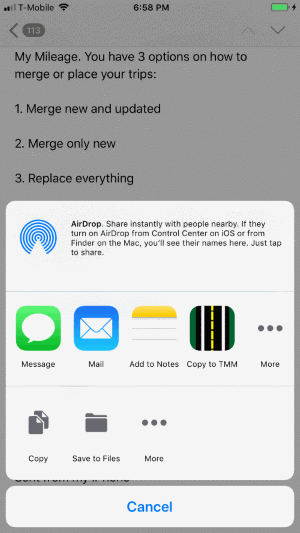
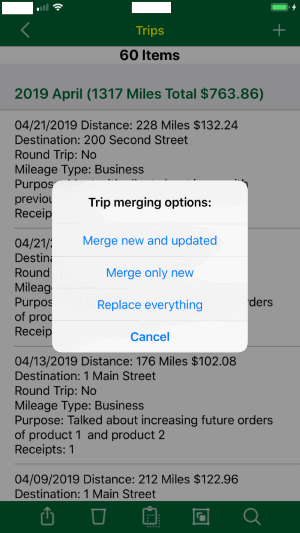
- Track My Mileage will launch, then choose the merging option that meets your needs:
- "Merge new and updated" will add any new trips and update any existing trips that have been modified
- "Merge only new" will only add any new trips
- "Replace everything" will overwrite all your current trips
No matter what option you choose, your existing trips will be backup to your iPhone or iPad before merging. Read this post to learn how to restore your original trips
- Once the process is complete, the trips will reload.
|
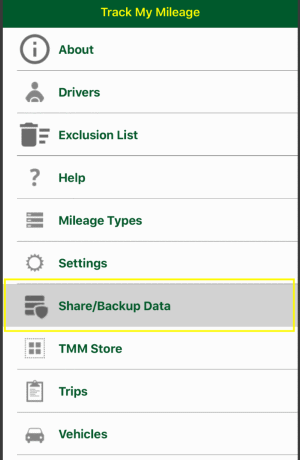
- If necessary tap the or button to show the main menu, then tap the "Share/Backup Data" row.
- On the Backup Export Options screen you have these options:
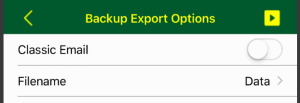
- Classic Email: this option disables the share sheet and goes directly to email.
- Filename: the name of the output file
- To coninue tap the
 button button

- Next, choose the option to share your trip data with:
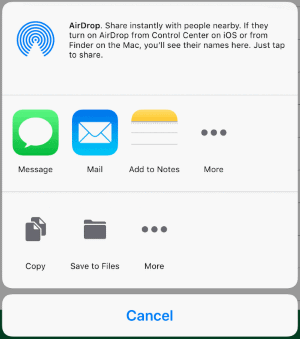
With AirDrop, you can wirelessly send and backup your trip data to a nearby iPhone, iPad, iPod touch, or Mac.
Or use e-mail to forward and backup your trip data.
- If you choose email then enter a email address that the devices you would like to share the data with can access then tap the "Send" button.
|
|
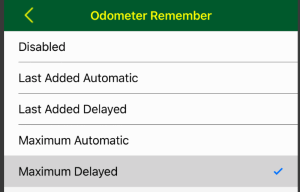
The app provides these options for remembering the last odometer value:
- Disabled: causes the app to not remember your last odometer value.
- Last Added Automatic: causes the app to automatically populate the odometer start with the last odometer stop value you added for the selected vehicle.
- Last Added Delayed: causes the app to remember the last odometer value you added for the selected vehicle only when you edit the odometer start.
- Maximum Added Automatic: causes the app to automatically populate the odometer start with the maximum odometer stop value you added for the selected vehicle.
- Maximum Added Delayed: causes the app to remember the maximum odometer value you added for the selected vehicle only when you edit the odometer start.
To update this setting:
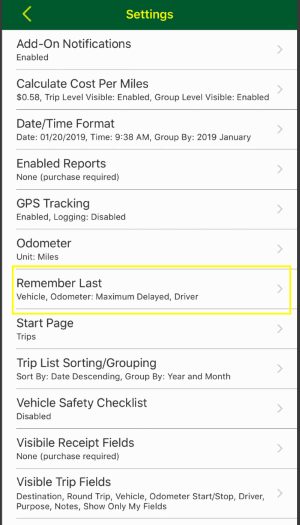
- Access the Settings Page (tap here to learn how)
- Then scroll down to and tap the "Remember Last" row.
- Then make sure Vehicle row is in the state.
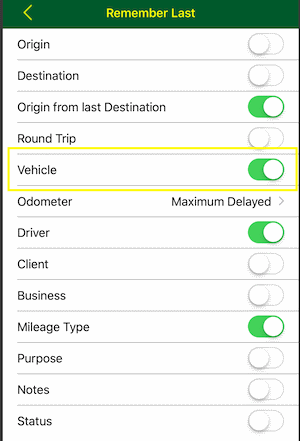
- Then tap the "Odometer" row.
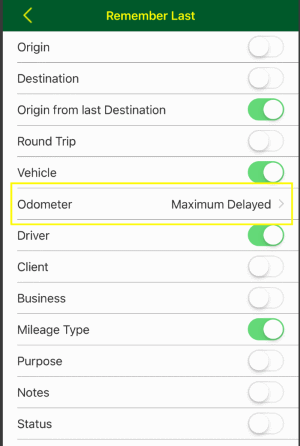
- A list of options will load, you then tap the row with option you would prefer.
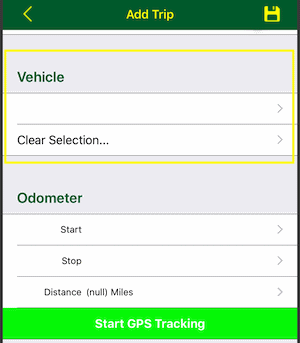
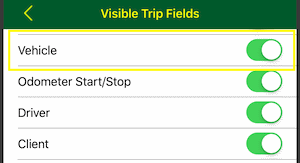
- Additionally, the Vehicle section must be visible on the trip edit page
- Tap here to learn how to show/hide trips fields
|